Showing posts with label Crumb. Show all posts

Sunday, March 1, 2015

Crumb quilt bound and washed

I have been meaning to post a picture of my crumb quilt.  This quilt was born out of a need to use up about two gallon bags worth of crumb pieces.  I had a basic idea of what I wanted and went from there.  Here it is!


The back has a story of its own.  For my birthday at work, several of my co-workers gave me each a yard of fabric that represented them.  They challenged me to "make it work."  Hah, they don't know me!  Regretfully, straight line quilting pushed the center strip off center, but I still love it.  This is a utility quilt and will see many a couch naps and quilt forts.


I am going to be linking up with JulieKQuilts binding blitz.  Her site is amazing in everything scrappy.  If you don't frequent her blog, you should start!

Sunday, January 18, 2015

A flimsy is born

I am trying to keep my momentum going.  This is the year of using up and finishing.  I don't have room in my temporary house to get more stuff or build my stash.  My scraps are overflowing.  This project was born out of a plan to reduce the stash of crumbs.  So far so good!

This was the original plan.


Somehow blocks were turned around in assembly.  But I kept going...


...and ended up with this.


Now I will add a small border.  I am thinking a black border with strategically placed flying geese.  As I sit here looking at the center, I even thing it would look good with a thin black border followed by a slightly larger burgundy red border.   Thoughts?

Sunday, January 4, 2015

Putting the crumbs together

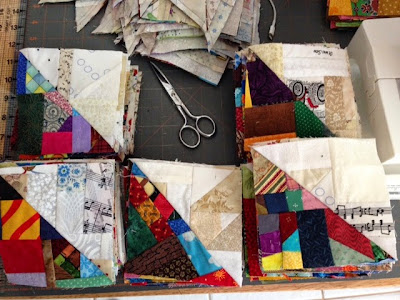
Nearly all of the crumbs have been sewn, and I am left with a pile of HSTs.  I seem to have enough for a throw quilt.


I first thought of laying them out in a zig zag format, but then tried an off-center barn raising pattern.  I made a few mistakes when laying them out, but nothing is yet sewn.  I just wanted to see what it would look like.


I am going with the barn raising layout.  I quite like how it will look.  I might use a border, but if so it would be small to set all those wonky edges before quilting.  I would love to make the quilt bigger, but I really don't have any neutral crumbs...I would be essentially made to cut bits of yardage down and then sew them back up.  I must resist the temptation and enjoy it as a smaller quilt.  The dark crumb blocks seen in the lower part of the zig-zag quilt can be used in a different project in the future.

Happy quilting!

Sunday, December 28, 2014

Crumb blocks are done

Over the holiday weekend, I managed to finish over 140 crumb blocks.


There aren't many crumby pieces left after it was all done.  I was really working at the end to make the blocks.


The next step is to make a ton (240) of HSTs with these babies.  They will finish at a bit over 4" I guess.

Saturday, May 21, 2011

Quilt Assembly and Borders.

I have been busy making my flying geese.  For this quilt you will need 138.  The flying geese for the crumb patch quilt will measure 2.5" x 4.5." It is important that you measure carefully and adjust the width of your inner border so your flying geese fit properly.  A good explanation  for why you have to measure so carefully can be found here at Quiltville

For starters, you actually have to make them first, right?  I made mine with a specialty ruler (Companion Angle, and EZ angle rulers).  You can make yours using a specialty ruler (also shown via the quiltville link) or there are other methods of making flying geese well explained by Connecting Threads


I assembled my flying geese making sure the colors were well distributed.


After I assembled my borders, I ironed them out and measured them to see exactly how big my inner borders had to be.  For the cornerstones, I made four four-patches.
It is assembly time!


One more step to go!  BTW, the inner border used 2.5" strips.  The side portion had to be a little bit narrower so the flying geese would fit properly.  Oh, and see the 4 patch cornerstone on the lower right corner?  Fixed that!  It was pointing the wrong way!

Next I am going to add a 4" finished blue border around the outside!